Transform Your Backyard: Uncover the Secrets to Crafting the Perfect DIY Pergola with a Stunning Canopy!
Imagine stepping into your backyard, greeted by a beautifully crafted pergola with a canopy, providing you with a perfect blend of shade and style. A pergola with a canopy not only enhances your outdoor space but also invites you to enjoy leisurely afternoons and evening gatherings with friends and family. The charm of DIY projects lies in the personal touch and satisfaction they bring, and constructing your own pergola is an excellent way to boost your backyard's aesthetics and functionality. In this article, we will guide you through the essentials of building a DIY pergola with a canopy, providing you with valuable insights and step-by-step instructions to make your project a success.
Understanding the Basics of a Pergola
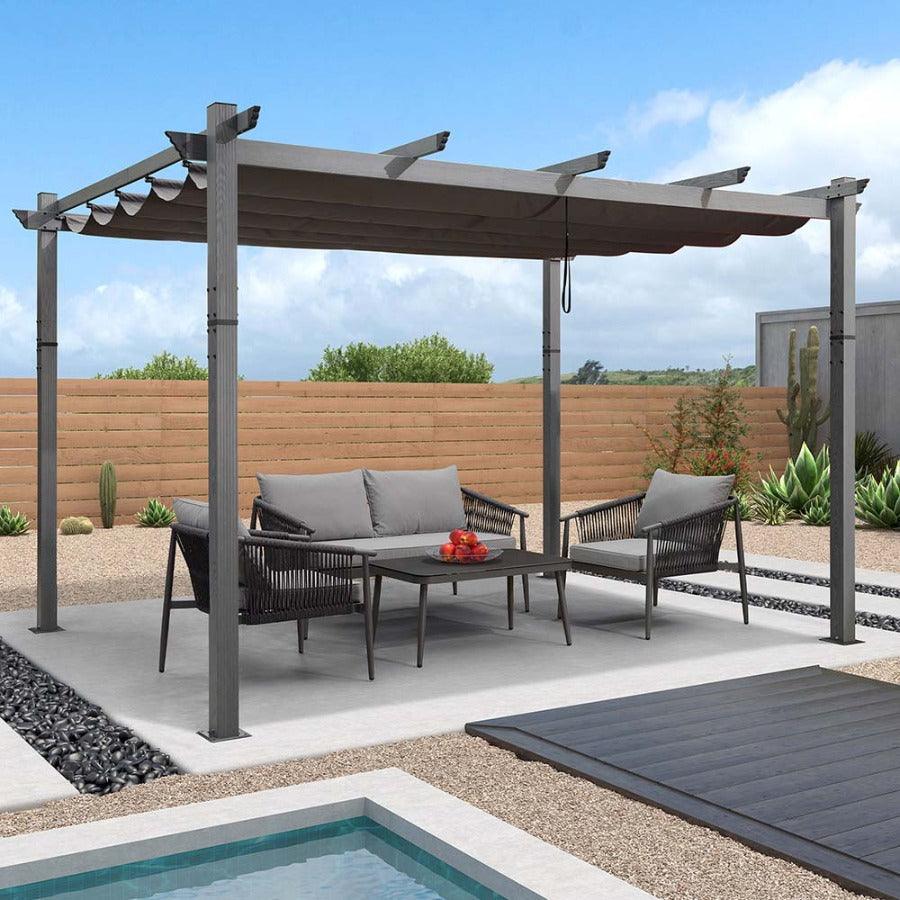
A pergola is an outdoor structure that typically consists of vertical posts or pillars supporting cross-beams and an open lattice roof. Traditionally used to create a walkway, passageway, or a place of refuge in gardens, modern pergolas serve as stunning focal points in backyards, offering both functional shade and visual interest. They can be designed in various styles, from classic wooden structures to sleek metal frames, and can be customized to suit any aesthetic. Common materials include wood, vinyl, and metal, each offering unique advantages in terms of durability and maintenance. A well-constructed pergola not only enhances the beauty of your garden but also provides a cozy spot for relaxation or entertaining guests.
Planning Your DIY Pergola
Before diving into your DIY project, careful planning is crucial to ensure a smooth construction process. Start by selecting the right location for your pergola, considering factors such as sunlight exposure and proximity to your home. Take accurate measurements of the space to determine the ideal size of your pergola, ensuring it complements your outdoor environment. It's also wise to check local building codes and regulations, as some areas may require permits for structures like pergolas. Additionally, consider the layout of your backyard, and think about how your new pergola will fit into the overall design. A friend of mine, who recently built a pergola, emphasized the importance of planning after encountering unexpected challenges during construction due to poor site selection. Taking the time to plan properly will save you headaches down the line.
Materials and Tools Needed
To embark on your DIY pergola project, you'll need a selection of essential materials and tools. Start with sturdy posts, beams, and rafters, which can be sourced from quality lumber or alternative materials like vinyl or metal. Don’t forget the hardware like screws, brackets, and anchors, which are necessary for securing the structure. For the canopy, choose a durable fabric or alternative material that suits your style and provides the level of shade you desire. As for tools, a saw, drill, level, measuring tape, and safety gear are must-haves. If you're looking to cut costs, consider using reclaimed wood or shopping at local hardware stores for budget-friendly options. Remember, investing in quality materials will ensure your pergola withstands the elements over time.
Step-by-Step Instructions for Building Your Pergola
Now, let's delve into the exciting part—building your pergola! Start by preparing the site; clear any debris and ensure the ground is level. Use stakes and string to outline the dimensions of your pergola based on your earlier measurements. Next, dig holes for the posts, making sure they are deep enough to provide stability—about one-third of the post length is a good rule of thumb. Once the holes are ready, place the posts and secure them with concrete. Allow the concrete to cure as per the manufacturer's instructions. After the posts are set, attach the horizontal beams using brackets for added support. Then, add the rafters on top, ensuring they are evenly spaced. A friend of mine enjoyed this part, as it was rewarding to see the structure take shape. Finally, install your chosen canopy. If it's a fabric canopy, you can use ropes or hooks to secure it; for a more permanent structure, consider framing it within the rafters. Finishing touches like paint or wood stain can enhance your pergola's look, making it a beautiful addition to your backyard.
Adding a Canopy: Styles and Installation
The type of canopy you choose can dramatically affect the look and functionality of your pergola. There are several options available, including fabric canopies that can be retracted or opened as needed, or more permanent structures like wooden slats or metal panels. Fabric canopies provide versatility and can be easily replaced or changed out for different seasons. Installing a fabric canopy typically involves attaching it to the rafters with hooks or ropes that allow for easy adjustment. For those opting for a more permanent solution, ensure that the structure is securely fastened, as it will need to withstand wind and weather conditions. Regular maintenance is essential, especially for fabric canopies, which should be cleaned and inspected for wear to prolong their lifespan. A well-installed canopy not only enhances the aesthetic appeal of your pergola but also provides valuable shade, creating a comfortable outdoor retreat.
Final Thoughts on Your DIY Pergola Project
Building a DIY pergola with a canopy is a rewarding project that can transform your outdoor space into a stylish and functional area for relaxation and entertainment. From understanding the basics of a pergola to planning, gathering materials, and following step-by-step instructions, this guide has equipped you with the knowledge you need to embark on your journey. Embrace the satisfaction that comes from completing a DIY project, and enjoy the beauty and utility your new pergola adds to your backyard. So grab your tools, unleash your creativity, and start crafting your perfect outdoor oasis!